Micro:bit - Getting Started
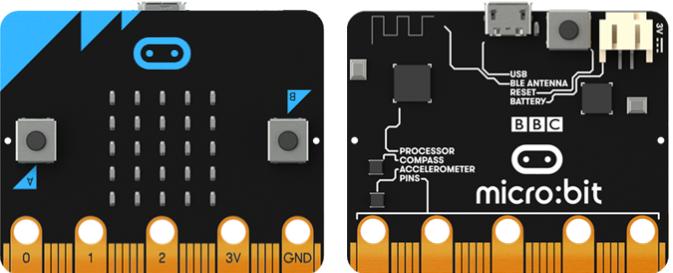
The BBC micro:bit is a tiny computer that you can use to create all kinds of projects from robots to musical instruments – the possibilities are endless. There are a myriad of features that you can use in your designs:
- 25 red LED lights that can flash messages.
- Two programmable buttons (A and B) that can be used to tell the micro:bit when to start and stop things.
- A thermistor to measure the temperature.
- A light sensor to measure the change in light.
- An accelerometer to detect motion.
- A magnetometer to tell you which direction you’re heading in.
- A radio and a Bluetooth Low Energy connection to interact with other devices.
Let’s create your first micro:bit program; after that, it’s really up to you to discover more.
Your First Program
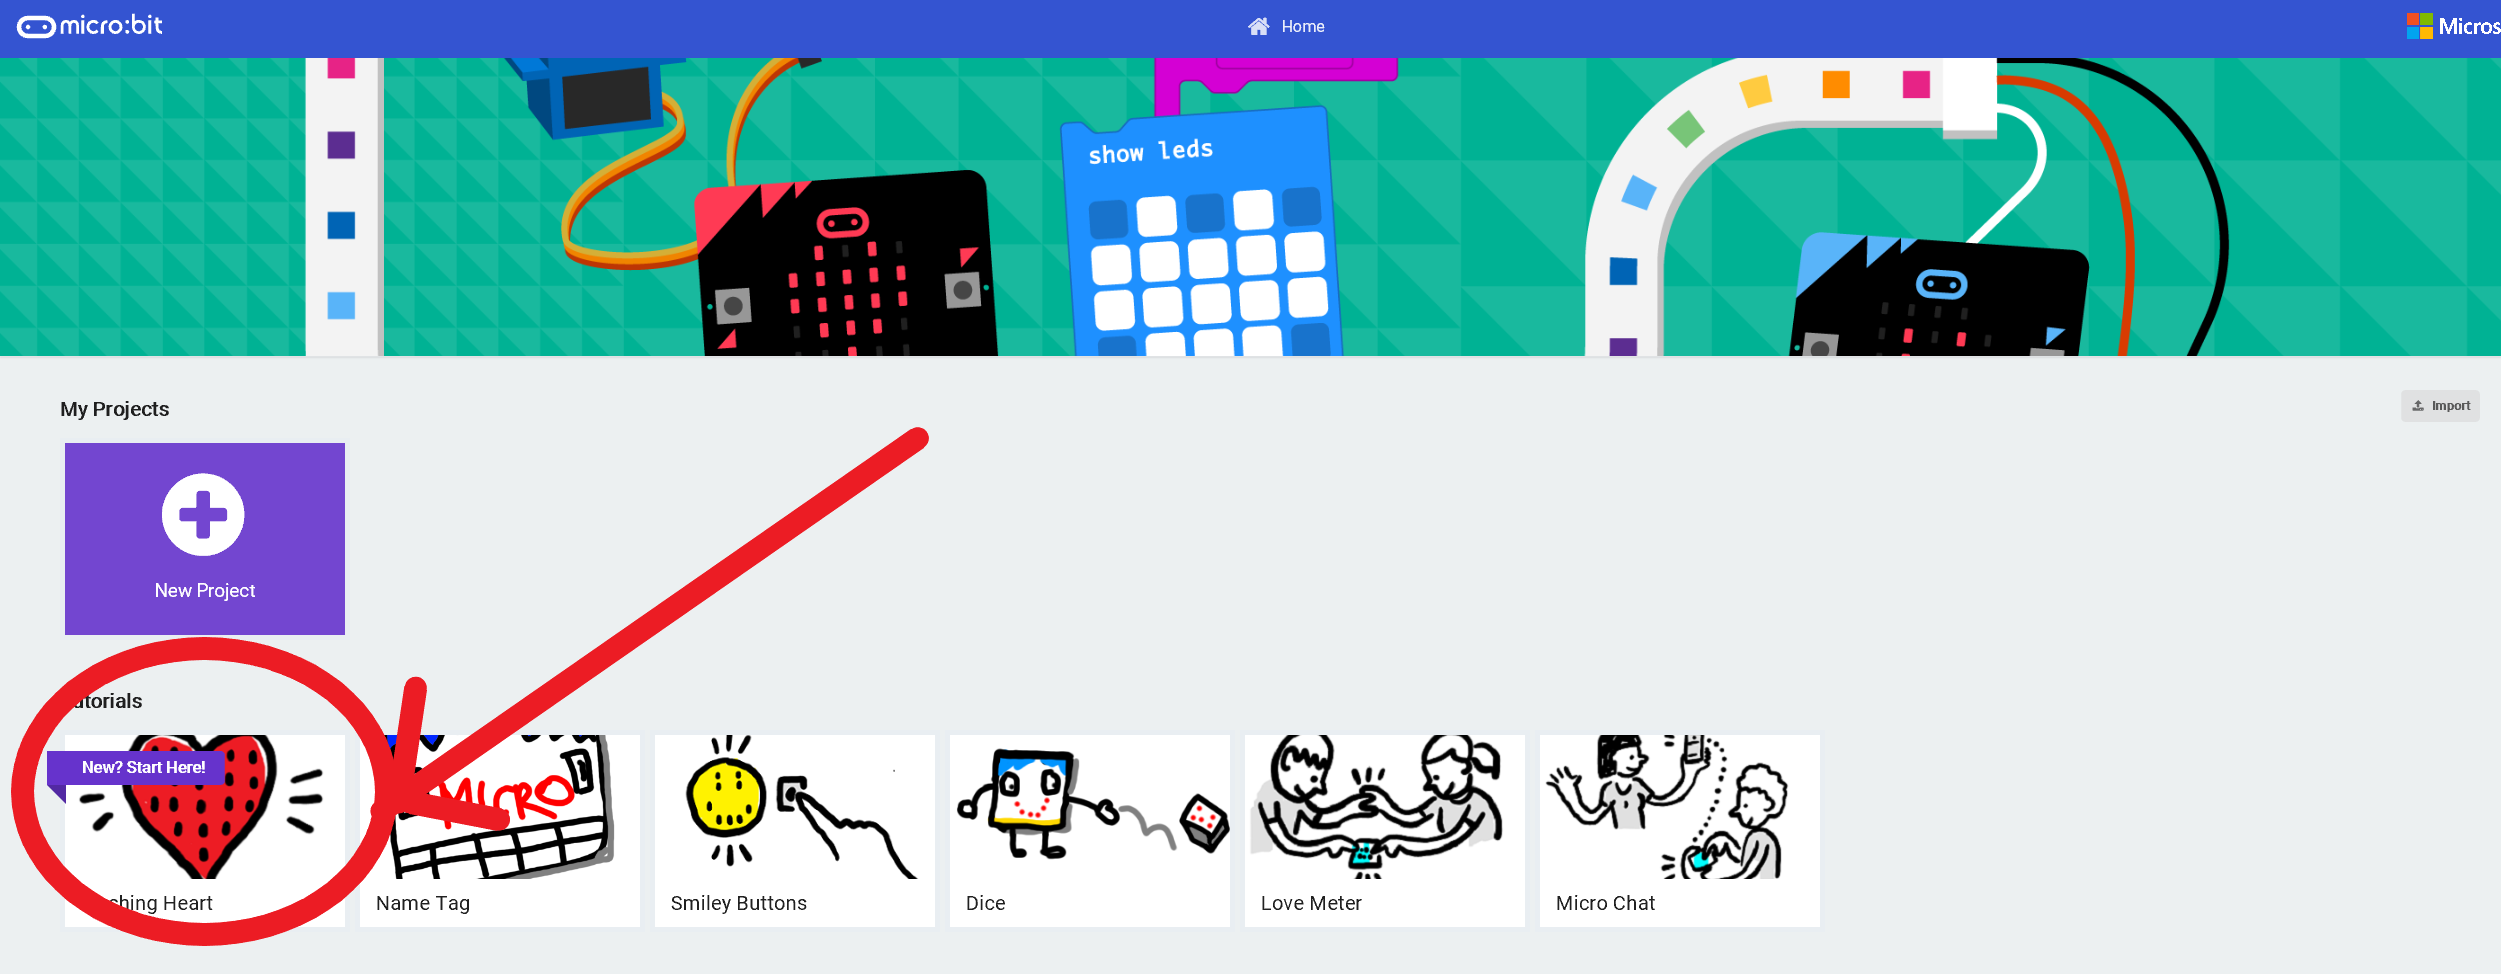
Go to the micro:bit code editor here: https://makecode.microbit.org, the homepage should look similar to the picture here, click through on and complete the Flashing Heart tutorial:
Can you make a change to your code? How about making the micro:bit display: “Hello <Your name>”? When you’ve done that, find out what happens when you put the code in the start block instead of the forever block like this:

Well done, you have written your first programs. Carry on and see what else you can do; try some of the other projects and search for others online.
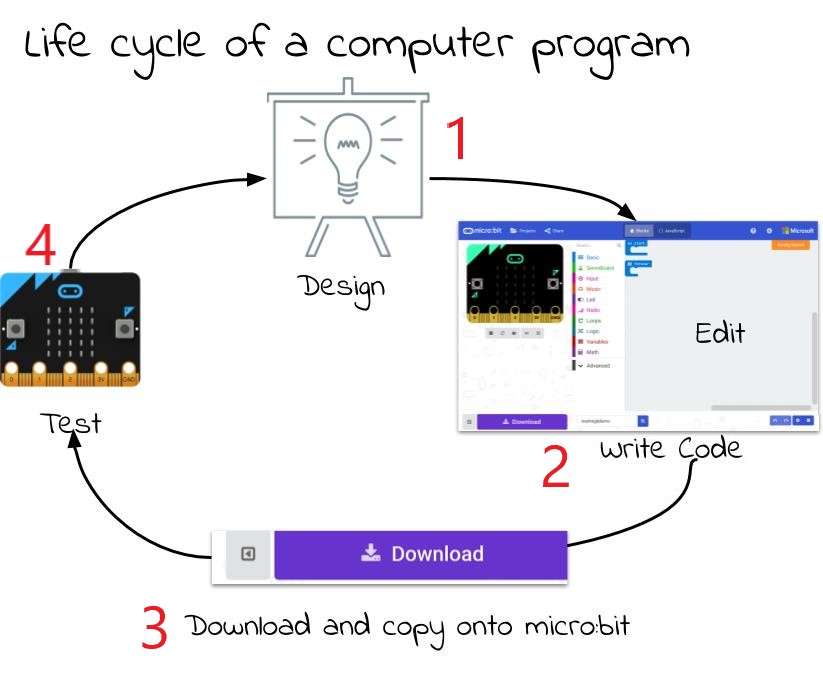
Coding using the micro:bit is composed of these 4 steps. You can expect to go around the loop quite a few times before you get your code working.